Chewy Chocolate, Oatmeal, Coconut Cookies

          Cookies are cool because they are absolutely ingredient driven.  Whether it’s the pure simplicity of a butter or sugar cookie  or the lumpy texture of a chocolate chunk, you know what you are going to be tasting.  This is unless the cookie has a silly name, like a Lu Lu or something, but I don’t think I eat any of those cookies.  Well, I do eat Tam Tams from Australia when I can so that’s not true.  My insight into Islamic cookies so far is that they are exquisitely beautiful and also delicious (ingredient driven, too), but have unsettling body part references like Fatimah’s Fingers.  Mmm.
          Go back to Cookies Till They Come to catch the storyline and understand where we are.  If you’ve read along, you will recall that one of the ingredients I bought in bulk this week was coconut.  For this cookie, I certainly did consider an upfront coconut feature, like macaroons, but I feared that basing all of the cookies on a nut or dried fruit might make them all seem like Middle Eastern treats, which is nice, but doesn’t necessarily say Merry Christmas.  Chocolate and oatmeal are what we need to make everyone feel at home.  The coconut just snuggles right along side.
Chewy Chocolate, Oatmeal, Coconut Cookies
Ingredients 
1 cup butter, softened 
1 1/4 cups packed brown sugar 
1/2 cup white sugar 
2 eggs 
2 tablespoons milk 
2 teaspoons vanilla extract 
1 3/4 cups all-purpose flour 
1 teaspoon baking soda 
1/2 teaspoon salt 
3 cups rolled oats 
2 cups semisweet chocolate chips 
1 cup chopped walnuts (optional) 
1 cup shredded coconut
Directions 
Preheat oven to 375 degrees F (190 degrees C). 
In a large bowl, cream together the butter, brown sugar and white sugar until smooth. Beat in the eggs one at a time, then stir in the milk and vanilla. Combine the flour, baking soda and salt; stir into the sugar mixture until well blended. Stir in the oats, chocolate chips. walnuts and coconut until evenly distributed. Drop by rounded tablespoons onto ungreased cookie sheet. 
Bake 10 to 12 minutes in the preheated oven for a chewy cookie or 14 minutes for a firmer cookie. 
Cool for 1 minute on the cookie sheet and then remove to wire rack. Cool completely and then store in tightly sealed container.

Cookies Till They Come

My boys are coming.  My boys are coming.  It’s Saturday morning and we were up late at our staff Christmas party last night, but I sprang out of bed with the call to prayer at sunrise.  We have that auditory time regulator here in Tunisia.  I love it.
I’m Tabitha Tittlemouse today.   Oh gosh, I love The Tale of Mrs.  Tittlemouse and her fastidiousness over every tiny detail, every tittle.  How about this line from the Wikipedia synopsis:  Mrs. Tittlemouse fears she “shall go distracted” as a result of the turmoil and takes refuge in the nut-cellar.  You know where to look for me if I need a little time out this week, though all that’s in our cellar is wine, no nuts.
There’s so much I want to do:  make up heavenly beds for jet-lagged boys to sink into, prep the basics of some midweek feasts so we can have friends over to enjoy the season and visit with the guys, and make cookies.   I think that this is going to be my nervous distraction for the next 24 hours, minus sleep, while I’m picturing them at every stage of their journey.
I can’t just pick any cookie recipe and pull it off, here.  I looked at Bon Appetit’s  31 days of cookies and  I can get many of those ingredients here, but often there is just one missing ingredient, like corn syrup, that makes me think they won’t come out right without it.  As with all things in Tunisia, it’s best to begin with what we’ve got.  There is actually a treasure trove of special ingredients available at the moment.  A local store had bulk-packaged quantities of the following this week:  hulled pistachios, shredded (unsweetened) coconut, dried apricots and hulled, toasted sesame seeds.  Added to that are some plump golden raisins and dried pears I bought in Nice and finally, some dried Montmorency cherries gifted to me by Shelly.  And I have ginger.  My friends and I are always so concerned  that we can’t get ginger here that we buy it in large amounts every time we see it.  It turns out that ginger has been available recently, both fresh and dried, like the stuff you see in the Chinese apothecary shops in China towns, and I now have all of the forms required to make a triple- ginger cookie, one of my very favorites.
Because I knew it would occupy the most oven time, I began with biscotti.  Cranberry/pistachio biscotti must be ubiquitous.  Recipes kept popping up all over.  My one unavailable ingredient in this recipe was almond extract and I do think it would have been a fine addition.

I dried the cranberries in my food dehydrator on Lummi Island when I was home in October.  They took an extremely long time to dry.  For about 24 hours, they were just hot, plump, berries not looking like they were getting any more shriveled.  So I started poking them and squeezing air out and finally some of them dried out and some didn’t so much.  I tossed them in a Ziploc anyway and brought them back here, keeping them in the freezer.  These are the end of them.
Once baked, sliced, and then oven dried, the pistachios in the cookies become deliciously nutty and the little bit of tart cranberry creates a bright accent.  I’m not even going to dip them in chocolate because I really like the vanilla/nut balance as it is.


Cranberry Pistachio Biscotti
Ingredients 
1/4 cup light olive oil 
3/4 cup white sugar 
2 teaspoons vanilla extract 
1/2 teaspoon almond extract 
2 eggs 
1 3/4 cups all-purpose flour 
1/4 teaspoon salt 
1 teaspoon baking powder 
1/2 cup dried cranberries 
1 1/2 cups pistachio nuts
Directions 
Preheat the oven to 300 degrees F (150 degrees C). 
In a large bowl, mix together oil and sugar until well blended. Mix in the vanilla and almond extracts, then beat in 
the eggs. Combine flour, salt, and baking powder; gradually stir into egg mixture. Mix in cranberries and nuts by
hand. 
Divide dough in half. Form two logs (12×2 inches) on a cookie sheet that has been lined with parchment paper.
Dough may be sticky; wet hands with cool water to handle dough more easily. 
Bake for 35 minutes in the preheated oven, or until logs are light brown. Remove from oven, and set aside to cool 
for 10 minutes. Reduce oven heat to 275 degrees F (135 degrees C). 
Cut logs on diagonal into 3/4 inch thick slices. Lay on sides on parchment covered cookie sheet. Bake 
approximately 8 to 10 minutes, or until dry; cool.
So that’s the first cookie and I am planning on a line up of five in the next 24 hours.   I just gave the boys a wake up Skype call and they are officially underway.
I’ll keep posting as I bake (is this fun?).   You can bake along with me if you’re inclined.

Mediterranean-Style Cracked Olives

        
          A few weeks ago, I began a project of home-curing olives.  Step 1 was to crack each one with a meat mallet and then soak them in water, drained daily, until they reached a palatable level of bitterness.  Part of the art of olive making, I discovered, is finding the perfect stage at which to stop the water bath.  I tasted an olive on day 8 and spat it into the sink.  Too bitter, still.  Then I tasted one on day 10 and uh oh, it tasted a little watery to me, a little washed out which I read can happen.  I quickly drained them at that moment and decided to go ahead with the brine to see what would happen.  For approximately 2 kgs. of fresh olives, I used the following formula for the brine:

1 liter of cool water
1/3  cup rock sea salt (or Kosher salt)
1/4  cup white wine vinegar
            Make a solution of these ingredients and pour over olives that have been packed into sterilized containers.  It is at this point that you can also add herbs and other seasonings.  I added whole garlic cloves, cuttings of fresh rosemary, and pink peppercorns.  If lemons were ready yet, I would have added a few bits of those.  The olives can be kept, covered, in the refrigerator, for around six months.  
I think I’m OK with the washed out issue.  Once they were out of water and into a brine, the flavor came back up and they taste really good to me.  I’m sure the flavor will continue to develop complexity the longer they marinate in the brine.  Next time, I might simply slice each olive rather than smash them.  Most of the olives are in tact, but some of them have broken pieces that make my jars look a little bit cloudy.  For a first attempt, I’m happy and I also know how these olives were handled and stored so I have confidence in their sanitation.

Henri Matisse and the Olive Forest

We’ve had tastes of Nice urban life, and the seaside.  Today, we had some blissful time to marinate in Provence which means olives, oranges, lavender and country life.  We went to the Matisse museum which is a renovated country French chateau that is now very much in the heart of suburbia.  So many of his sketches and paintings focus on simple subjects:  the form of a common woman, a still life of fruit.  I love the colors he pulls in to his paintings as they are the colors I find naturally work their way into the beige background of my life on the Mediterranean.

The spire you see in some of the photos is a Franciscan chapel on the property.

I forget how inspiring and energizing it can be to walk through beautifully designed and manicured urban parks.  This 19th century structure is surrounded on one side by an olive forest and the other side by rustically designed French kitchen gardens.  That means that most of what is growing on this property is edible.  I want to remember to mix pansies and calendulas with chard and kale.

This enclosed herb garden is a perfect place to come and sit in the sun on a Saturday morning with preschoolers.
Next time I come to Provence, I hope to go straight to the country to soak in the sun, earth, Mediterranean plant life and the colors.

Menton, Monte-Carlo, Monaco

Here’s what’s different about the Mediterranean from the French side.  First of all, the coastline is long and uninterrupted.  When you’re out all day, you don’t just catch glimpses of it, the shoreline is protected from development and you can view it with the expanse of a wide-angle lens most of the time.  Second, it looks like the ocean right after God made it.  It is baby blue, and effervescent, and perfectly clean.  I was trying to capture that essence and I think the heading photo got some of it.

            We figured out the local train line today, which always makes us feel like self-sufficient travelers.
We went to the last town on the line that is still in France: Menton.
Here, we had a picnic at the beach and watched retirees taking morning swims, riding bicycles, playing tennis, running and then meeting each other at seaside cafes for an express.
Clay courts
It’s November and this is Europe.  The water is not actually warm.
            This would be a fabulous place to spend retirement days, living a healthy life between sea and ski.  I could certainly embrace it as long as my own dear friends came along to share it with me.   I’m saving those days for them and my family.
           Almost exactly two years ago, our friend Bryan had a James Bond themed 50th birthday party in Kathmandu.  Allan and I weren’t the most cleverly dressed, but we did win the “Most Likely to Actually go to Monte-Carlo” award.   These friends already knew that we were moving to the Mediterranean so it was a hedged bet.  Now,  two years later, we have fulfilled the prediction.  It was a little hard to get the whole sense of Monaco/Monte-Carlo.  These twin cities in the Monaco principality are practically chiseled into the steep, rocky hillside.  You have to go up one hillside and around a small mountain to get to the other one and you can’t really see it all at once.  You end up taking elevators and escalators through the inside of a mountain and then you emerge … somewhere, look around and try to determine where you would try to go next if you reentered the mountain transit system.  Here are little peeks into hillside lives.
It was clear, however, where the marina was.  It was down.  This picture does not do any justice to the yachts we saw.
          Allan estimated that we were looking at probably 50 yachts in the Monte-Carlo marina of 150 feet or more in length.  It was actually a little weird.  I don’t mean that to sound particularly judgmental, but to just see that much wealth in one place is like seeing a Martian landing.  It’s unfamiliar and otherworldly.  We for sure saw the 1% of the world today.

Thanksgiving on the French Riviera

Can you imagine writing those five words?  I never could either.  I did not grow up thinking I would travel anywhere in my life, didn’t really even think about it.  Funny reality now is that the French Riviera is a whole lot closer than going to Grandma’s house for Thanksgiving, though not necessarily sweeter.

            Thursday morning, we caught a 9:00 AM flight and were in Nice for lunch.
I really did not have any preconceived expectation of what Nice would be.  As I trolled the Internet for an affordable boutique hotel, I became more and more concerned that Nice was a typical beachfront resort town, completely overused by northern Europeans.  The hotel rooms looked a little sweaty, faded, and expensive.
            What I’ve encountered in Nice so far is a crisp, clean, underpopulated city.  The city clearly values its natural beauty, preserving miles and miles of beachfront promenade, framed by the snow-capped French Alps in the background.  The air is chilly enough to wear leather coats and boots, but when you sit in the sun at a café for lunch, you can shed your coat and sit comfortably in your sleeveless dress.  And there are many, many fit, suntanned retirees (almost all walking French Bulldogs) who generally keep the prices down in a town.  I really like it here; I can feel myself already falling in love.  By the way, after hours and hours of Internet searching, it turns out I chose a wonderful boutique hotel:  It is La Villa Nice Promenade (11 Rue Saint Philippe).   Perfectly located near the Promenade, but quietly tucked away off the busy street, it is clean and simple, but has a decorative flair.  Best yet, it is under $100. 00 US per night.
            This is the only turkey we saw today.
            The best gelato in Nice, according to Kaye Syrah.  I’ll have to go back when it’s not siesta time.
            An old carousel in the central park.
            A couple having lunch under a laden, rectangular orange tree.  I know it’s anal, but I love French gardening.

Turkey Deconstructed

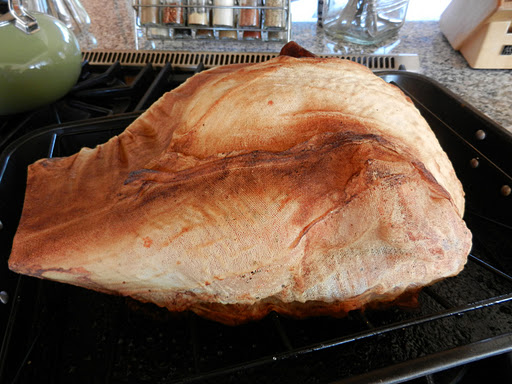
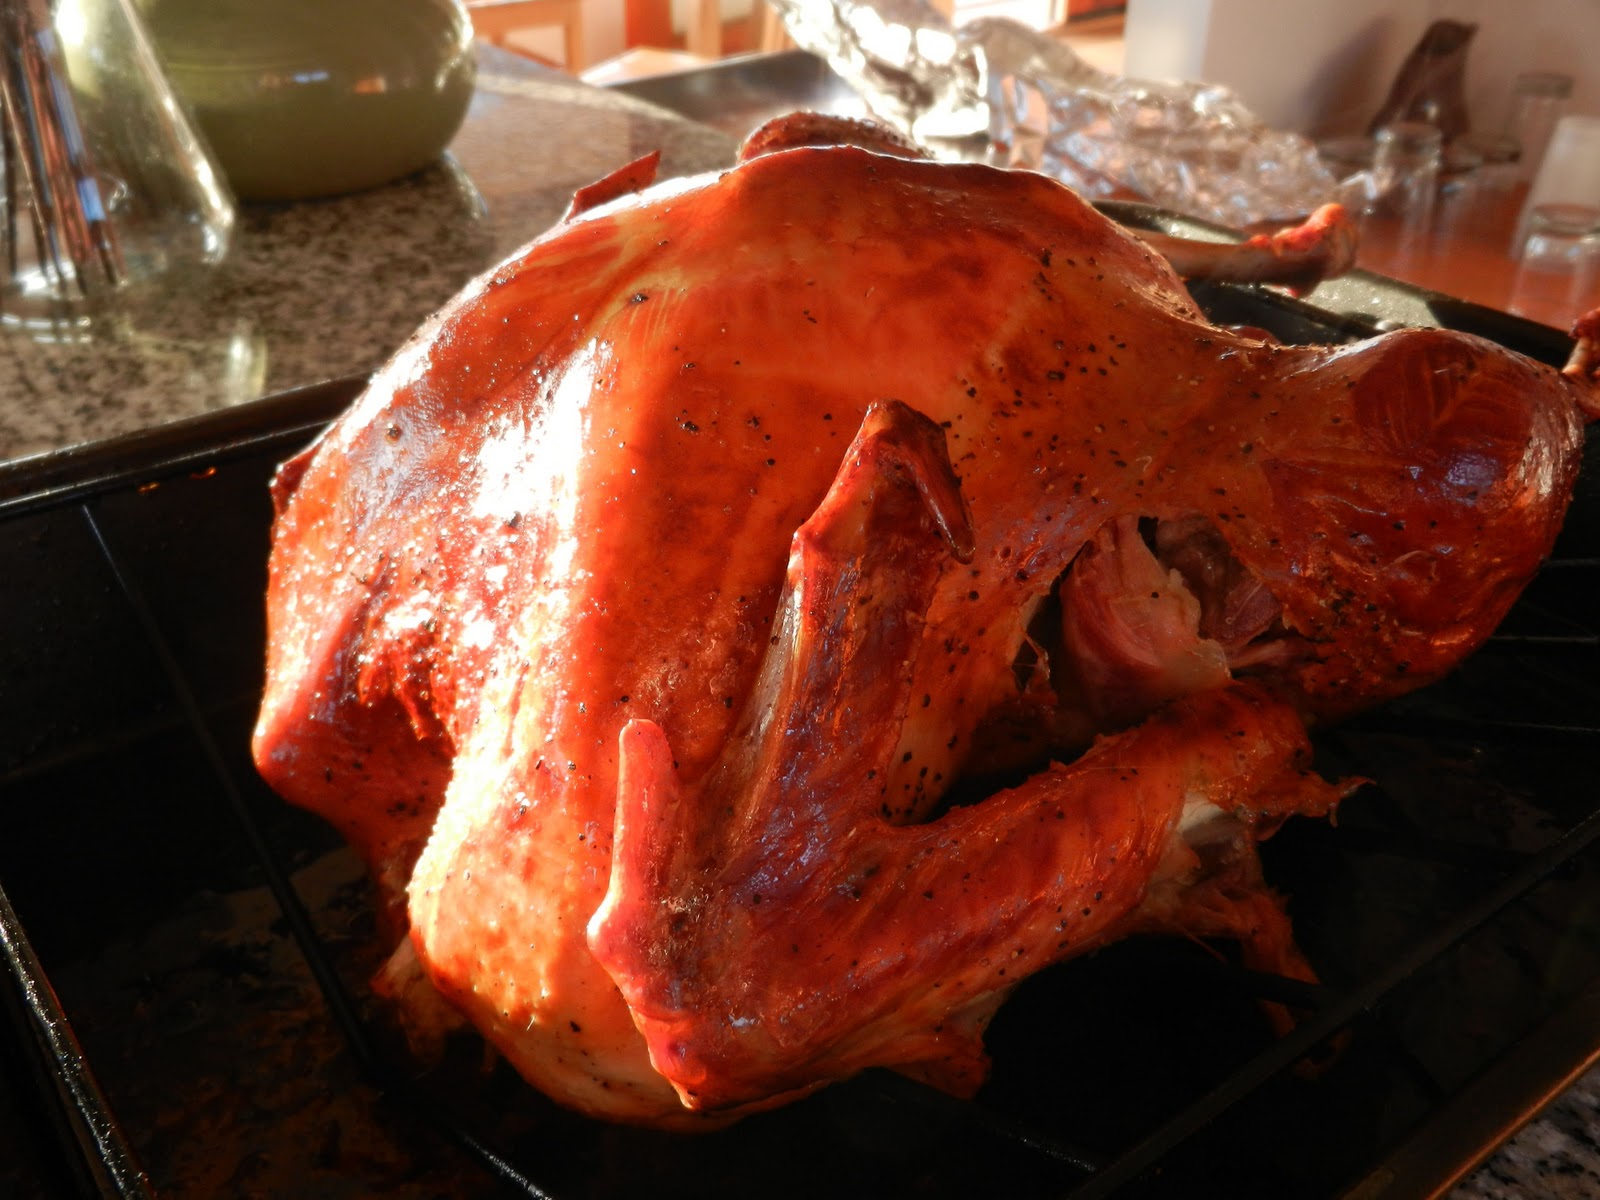
            As I said, we’re not going to be home for Thanksgiving Day this year.  But I’m still sentimental about turkeys, even though I already made an early Thanksgiving dinner with my boys when I was home on Lummi Island in October.  I do highly recommend that butter and wine shrouded turkey we made.

            But when you live overseas, your options are limited both by the availability of turkey and by the size of your oven.  We are fortunate in Tunisia that turkeys were introduced here as a Peace Corps initiative decades ago and they are available year-around.
            For preparation methods, this is a good time to consult the wisdom of American star chefs who live abroad and one of my favorites is David Tanis.  He is the head chef for six months of the year at Chez Panisse, in Berkeley, and then lives a French life for the other six.
I don’t have a small oven here.  I was fortunate to inherit an imported GE Profile, regulation American size.  It is a completely common oven in the US, but here, it is a prize and I do love it.  More the norm, though, is a small oven that can’t hold anything of much breadth.
            David Tanis had this problem and writes about a fortuitous French communication error that ended up leading to one of his best Thanksgiving meals ever.
Americans Abroad
            One year, I was the one making Thanksgiving dinner in Paris, and for this particular meal, it seemed as if we had every expat in town descend on our little Paris apartment on the rue St. Jacques.  There were going to be about forty-five of us in all.  So I went to my neighborhood butcher, Charcellet, to get my turkey.  They have really good turkeys in France—small but tasty—and Parisians know about la fete americaine.  I told the butcher that I wanted him to take the breasts off, take the legs off, and save me all the bones.  I told him I needed three birds, see you tomorrow, au revoir.
            I came back the next day and he showed me what he’d done; instead of cutting off the legs and breasts, he had deboned the whole turkeys, as only a master butcher can do.  I marveled.  It turned out to be a brilliant solution because we have the tiniest oven in the world.  At first the birds were flat as roadkill, but I put salt and pepper all over them, smeared the insides with garlic and thyme and sage in great quantity, molded them back into a bird shape, and tied them with string to keep them compact.
            Long story short, I found that three compact little re-formed turkeys would fit side by side in one roasting pan.  When they came out of the oven, I had perfectly cooked roast turkeys with not a speck of unusable anything!  And the cooking time was only an hour and a half.
            Our friends said it was the best turkey they’d ever had in their lives.  You could slice through the body as if it were a galantine—all meat and no stuffing.  And this technique applies to every bird in the world.  All you need is a good butcher or a lot of patience.  Simpler by far is the recipe for the deconstructed bird that follows.
Roasted and Braised Turkey with Gravy
            I always prefer to cook a smaller turkey.  The secret to great flavor is to season the turkey overnight so begin this process the day before.  You can make the broth a day ahead, too.
            Have the butcher remove the legs with the thighs attached, cut off the wings, and cut the boneless breast in 2 pieces.  While you’re at it, ask him to chop up the carcass for your stock.  You’ll be going home with 2 whole legs with thighs, 2 wings, the skin-on breast in 2 pieces and a bag of bones.  Make sure to get the giblets, too.
For the turkey
One 12- to 14-pound turkey, cut into six parts (as above)
Salt and pepper
1 bunch sage leaves, chopped
1 small bunch thyme, leaves stripped and chopped
6 garlic cloves, smashed to a paste with a little salt
2 tablespoons olive oil
For the broth
3 pounds turkey carcass and bones (or other poultry bones)
1 large onion, peeled, halved, and stuck with 1 clove
1 carrot, peeled and chopped
1 celery stalk, chopped
2 bay leaves
2 or 3 slices dried porcini mushroom
About 6 quarts water
For the braise
3 tablespoons butter
2 large onions, chopped
Salt and pepper
3 tablespoons all-purpose flour
1 tablespoons tomato paste
1 cup dry red wine
Parsley or watercress sprigs
Put all the turkey pieces out on a big cutting board and season well on both sides with salt and pepper.
            Mix the sage, thyme, and garlic in a small bowl and add the olive oil.  Spoon the seasoning mixture over the meat and smear it in well.  Put the legs and wings in a container, cover, and refrigerate.  Wrap the breasts in plastic and refrigerate.
            To make the broth, preheat the oven to 400’F.  Put the turkey carcass and bones, onion, carrot, celery, and bay leaves in a roasting pan and into the oven.  Roast for about 30 minutes, stirring occasionally, until everything is nicely browned.
            Transfer the browned vegetables and bones to a big soup pot.  Splash a little water into the roasting pan to dissolve any tasty bits left in the pan, and put into the pot.  Add the dried mushroom and water and bring to a boil.  Skim off the scum, turn the heat down to a simmer, and let it cook slowly for 1 ½ to 2 hours.
            Strain the broth through a sieve.  You should have about 5 quarts of turkey broth.  Cool, then refrigerate; when ready to use, skim off the fat that has risen to the surface.
            To make the braise, preheat the oven to 400’ F.  Put the legs and wings in a large roasting pan, with enough room so they’re not crowded.  Put the pan in the oven and let the parts roast while you prepare the braising liquid. 
            In a large skillet over medium heat, melt the butter.  Add the onions and season them with salt and pepper.  Let them cook gently, stirring occasionally, until softened, about 10 minutes.  Turn up the heat and let the onions color a little bit.
            With a wooden spoon, stir in the flour and tomato paste and mix well.  Add the red wine and 2 cups of the turkey broth and bring to a simmer, stirring as the sauce thickens.  Gradually stir in 2 more cups of broth.
            Remove the pan of legs and wings from the oven.  They should be nicely golden, but not too dark.  Pour the braising liquid over the legs.  Cover the pan tightly with foil and return to the oven.  Reduce the heat to 350’ F and let it go for about 1 ½ hours, or until the legs are tender when tested with a fork.  Transfer the legs and wings to a cutting board and let them cool slightly.
            Strain the braising liquid through a fine-mesh sieve into a saucepan, skimming off any fat tat rises.  This will be your gravy.  Taste the sauce for seasonings and texture.  If it’s too thin, reduce it a bit over medium heat until it reaches a consistency you like.  Set aside.  (The braise can be done hours ahead or the day before and refrigerated.)
            When the turkey parts are cool enough to handle, remove the let meat from the bones in large pieces and tear the meat from the wings.  Cut the meat into rough slices and put in a baking dish.  Cover and hold at cool room temperature.
            Remove the breasts from the refrigerator and let them come to room temperature.  The breasts will take only about a half hour to roast, so they can be started up to an hour before dinner in a 375’ F oven.  Put them in a shallow roasting pan, skin side up, and into the over.  Check at 30 minutes—you want an internal temperature of 140’F (The temperature will continue to rise as they rest.)  Let them rest on a platter, loosely covered, for 15 to 30 minutes before carving.
            Shortly before serving, reheat the dark meat in the oven for 10 to 15 minute, until heated through.  Reheat the gravy and put it in a serving bowl.
            Slice the turkey breasts on an angle, not too thickly.  Arrange the turkey on a warm platter and garnish with parsley or watercress.
(Tanis, David.  2010.  Heart of the Artichoke.  New York, Artisan.)
This is going out to all of my expatriate friends all over the world.  Happy Thanksgiving with the families you’ve pulled around you.

Whole Orange Cake

Thanksgiving is coming up this week, but we won’t be at home for Thanksgiving Day.  Having Thursday and the connecting Friday off from work creates an irresistible draw to do some regional traveling.  I’ll tell you later in the week where we will be.  Never-the-less, I feel like doing some festive cooking.
We are just on the cusp of orange season.  I won’t add them to the What’s in Season list yet because they’re still a tinge green and a tiny bit sour, comparatively, but the scent of oranges does conjure the holidays, in my mind.
I’ve been waiting a few weeks to try this whole orange cake.  It seems to be an Australian country wives’ recipe, but I had to do so much converting that this recipe is mine now.  If you want to check the original or if you prefer metric measurements, here is the link.  Otherwise, you should just trust me.  I am very much in the mood for a cake with the marmalade-like brightness this cake implies.  Ground almonds will temper that mood enough.  Then, it will be soaked in an orange rind and dessert wine syrup.
We stock our wine cellar at a winery not far from Hammamet called Domaine Atlas.  Pictured below is the actual Bredy wheelbarrow of wine cases we bought the last time we were there.  Mind you, we entertain a lot.  Each time we are there, we stick in a few bottles of their dessert wine which comes in clear,  unlabeled bottles. The Australian recipe calls for botrytis-style dessert wine.  Botrytisis really a controlled decomposition process which is why it is fondly referred to as “noble rot”.  I don’t know how noble our local product is, but it is suitable for sipping and cooking.

When I took this photograph, I had in mind one of those magazine set ups like oranges + almonds + dessert wine using actual plus signs, but I don’t know how to do all that so the key ingredients are  just all there mingling in a group.

Whole Orange & Almond Cake with Dessert Wine Syrup


Ingredients (serves 8)
3 large oranges 
Melted butter (to grease  pan)
5 eggs 
1 1/2 cups caster sugar
2 cups almond meal 
1/2 cup all-purpose flour
1 tsp. baking powder 
1/4 tsp. salt
1 1/2 cups dessert wine
1 tsp. thyme, lavender buds, or Herbes de Provence (optional)
Double cream, to serve
Method
1. Place 2 oranges in a large saucepan and cover with cold water. Bring to the boil over high heat. Drain. Return oranges to the pan and repeat process (this will reduce the bitterness of the peel). Return oranges to the pan once again and cover with cold water. Bring to the boil over high heat. Reduce heat to medium-low and simmer, adding more water when necessary to keep oranges covered, for 1 hour or until oranges are very tender. Drain. Set aside for 2 hours or until cooled to room temperature.
2. Preheat oven to 325′ F. Brush a round 8 inch cake pan with melted butter to lightly grease. Line the base with parchment paper. Cut oranges into quarters. Remove the white cores and any seeds. Place in the bowl of a food processor and process until smooth.
3. Use an electric beater to whisk the eggs and 1 cup of the sugar in a large bowl until thick and pale. Stir in the orange puree. Add the almond meal, flour and baking powder, and stir until just combined. Pour into the prepared pan and use the back of a spoon to smooth the surface. Bake in preheated oven for 1 1/4 hours or until a skewer inserted into the center comes out clean. Set aside for 5 minutes to cool slightly.
4. Meanwhile, use a zester to remove the rind from the remaining orange.  Juice the orange and place in a medium saucepan along with the rind, wine, remaining sugar and herbs. Place over low heat and cook, stirring, for 2 minutes or until sugar dissolves. Increase heat to high and bring to a boil. Cook, without stirring, for 2-3 minutes or until syrup thickens slightly. Remove from heat.
5. Turn cake onto a wire rack over a baking tray. Spoon the hot syrup over the warm cake. Set aside for 30 minutes to cool. Cut cake into wedges and place on serving plates. Drizzle with any remaining syrup and serve with double cream, if desired.

Chanterelle Risotto

Oh, these chanterelles.  What a surprise they were at the market yesterday.  When we lived in Bellingham, we used to go into the woods on Mt. Baker and forage for them in the fall, but we never got a batch this bounteous.  I’m estimating they cost about $4.00 per pound here, but I might not find them again this year.  That’s how it goes here: Grab them when you see them.
As we were drooling over them as they lay drying on their kitchen towel, our friend Shelly asked what we were going to do with them and actually, we hadn’t decided yet.  She suggested risotto, which was a great idea because we already had everything to make it so we could pull it off on a Monday night.
I adapted a recipe by Tyler Florence for Porcini and Chanterelle Risotto, but used a decadent whole pound of straight chanterelles.

Chanterelle Risotto
Ingredients 

1/4 cupextra-virgin olive oil 
1/4 cup unsalted butter 
2 shallots, minced 
1 pound fresh chanterelle mushrooms, stemmed and sliced

3 sprigs fresh thyme, leaves only 
1 fresh bay leaf 
2 cups white wine 
Sea salt and freshly ground black pepper 
2 cups arborio rice 
6 cups chicken stock 
2 tablespoons fresh parsley, minced 
1/2 cupParmesan

Directions
Warm a wide large heavy-bottomed pan over a medium-low flame. Add 2 tablespoons olive oil and 2 tablespoons butter and melt together. Add shallots and cook for 2 minutes, or until translucent, and then toss the mushrooms, thyme, and bay leaf into the pan. Cook for 10 minutes, stirring occasionally, until the mushrooms have released their moisture and begin to turn golden brown.
Pour 1 cup of the wine into the pan, and bring the liquid to a simmer, allowing the wine to evaporate. Continue cooking until the mushrooms are dry, about 5 to 7 minutes. Season with sea salt and freshly ground black pepper. Remove mushrooms from the pan and set aside. Discard the bay leaf.
Reduce the flame to low, and add the remaining butter and oil to the pan and melt. Stir in the rice and coat with the oil until the kernels are shiny, about 3 to 5 minutes. Pour in the remaining 1 cup of white wine and let evaporate.
Add the chicken broth, 1 ladle at a time, allowing the rice to absorb the liquid. Do not add too quickly so as to prevent the kernels from exploding. Stir over a gentle flame until each ladle of the liquid is absorbed. Repeat until most of the broth is incorporated and the risotto rice is al dente, about 25 minutes.
Fold the mushrooms back into the rice and season with salt, pepper and parsley.  Stir in the Parmesan and serve immediately. 

To make a completely honest disclosure, I’ve gotta tell you that my husband is the primary risotto maker in our family.  It’s one of his specialties and I was mostly his sous chef.

Home Cured Olives, Part I

          So you know we actually live in Tunisia where I have heard it is against the law to cut down an olive tree.  I wasn’t planning to anyway, but it definitely indicates an attachment and commitment to the tree.  Of course, we can buy a large variety of commercially-cured olives here, year-around, but I have wondered what would be involved in curing them myself.  You can buy fresh olives this time of year for as little as 1 dinar (about 70 cents) for 1 kg.  so aside from the waste involved in a failed attempt, it’s not an expensive exploration.  I bought 2 kgs. of these beautes yesterday at the market.

Since this process technically falls under the heading of preserving food, I got some good advice so I don’t end up growing  something undesirable, like bacteria.  I figured the University of California, Department of Agriculture and Resources would have this researched.  They have a 26 page e-booklet called Olives:  Safe Methods for Home Pickling.
I wanted to get the very long process started and think more about the brine in a few days so I chose the method for Mediterranean Cracked Olives.  One begins by cracking the olives, but not the pits, with a mallet or rolling pin and submerging them in a water bath, changing the water twice daily,  for at least 10 days or until enough of the bitterness has been removed.

This was a nifty suggestion for keeping the olives submerged.  It is simply a Ziploc bag filled with water.

You can already see the oil floating to the top.  I’ll let you know what I’ve got in 10 days.